Key Takeaways
- To convert a video lecture to an M4A audio file, launch Windows 11’s built-in ClipChamp app, create a new project, import the video file, select the option to detach the audio, and find the audio file in the “Downloads” folder.
- To get an MP3 file out of a video, launch the free VLC app, select Media > Convert/Save, load the video file, and start the conversion process.
- You can perform the video-to-audio conversion from Command Prompt using the free and open-source FFmpeg utility.
- If you don’t wish to use an app, head to a web-based media converter like Online Audio Converter to turn videos into audiobooks.
If you only care about a video’s audio part, it’s quick and easy to turn any video into an audiobook. You have multiple ways to perform this video-to-audio conversion, and we’ll show you your options on Windows 11.
Using Microsoft ClipChamp (Built-In App, Supports M4A Format)
Microsoft ClipChamp is a built-in Windows 11 app that allows you to edit videos as well as extract audio from video files. This app generates an M4A audio file out of your videos. Note that if you need the resulting audio in another format, say MP3, use one of the methods listed below.
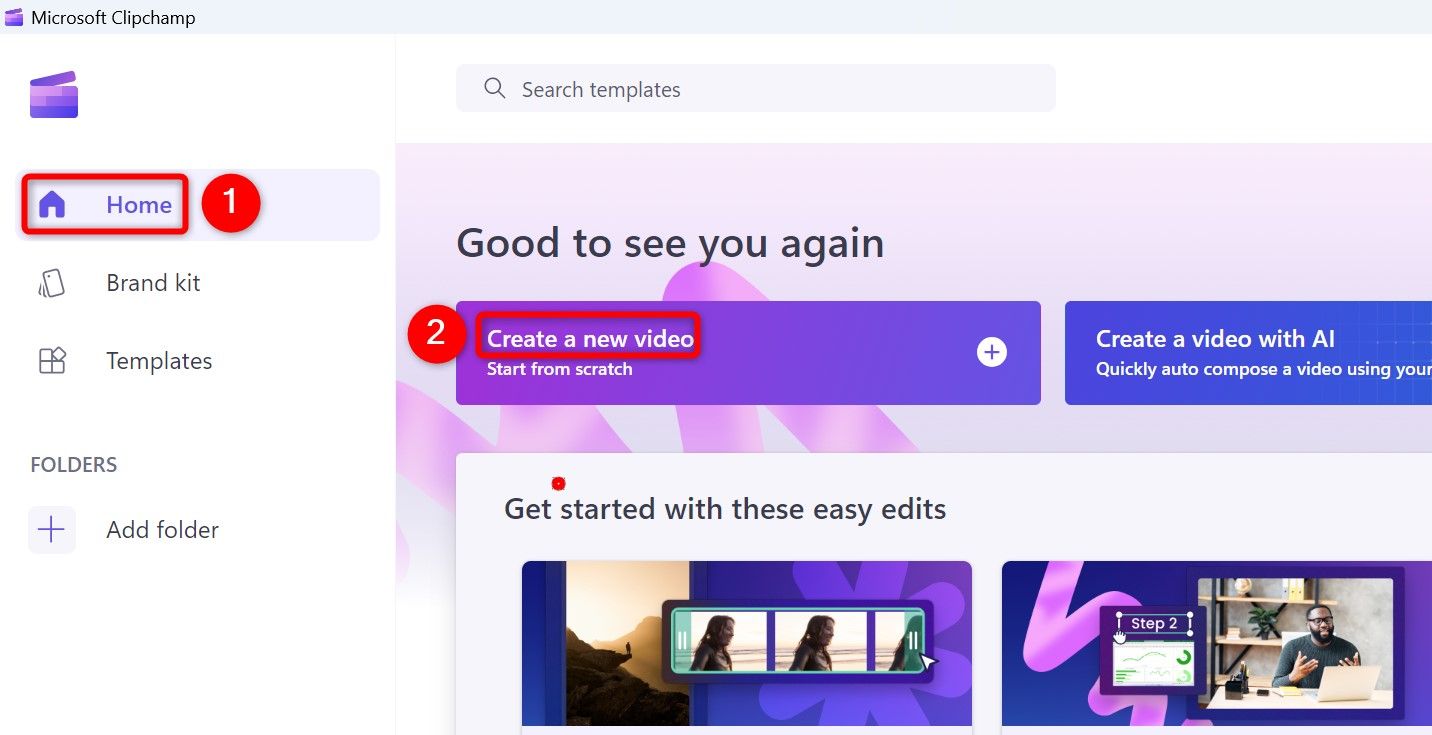
To use this method, open Windows Search, search for Microsoft ClipChamp, and launch the app. From the app’s left sidebar, select “Home.” On the right pane, choose “Create a New Video.”
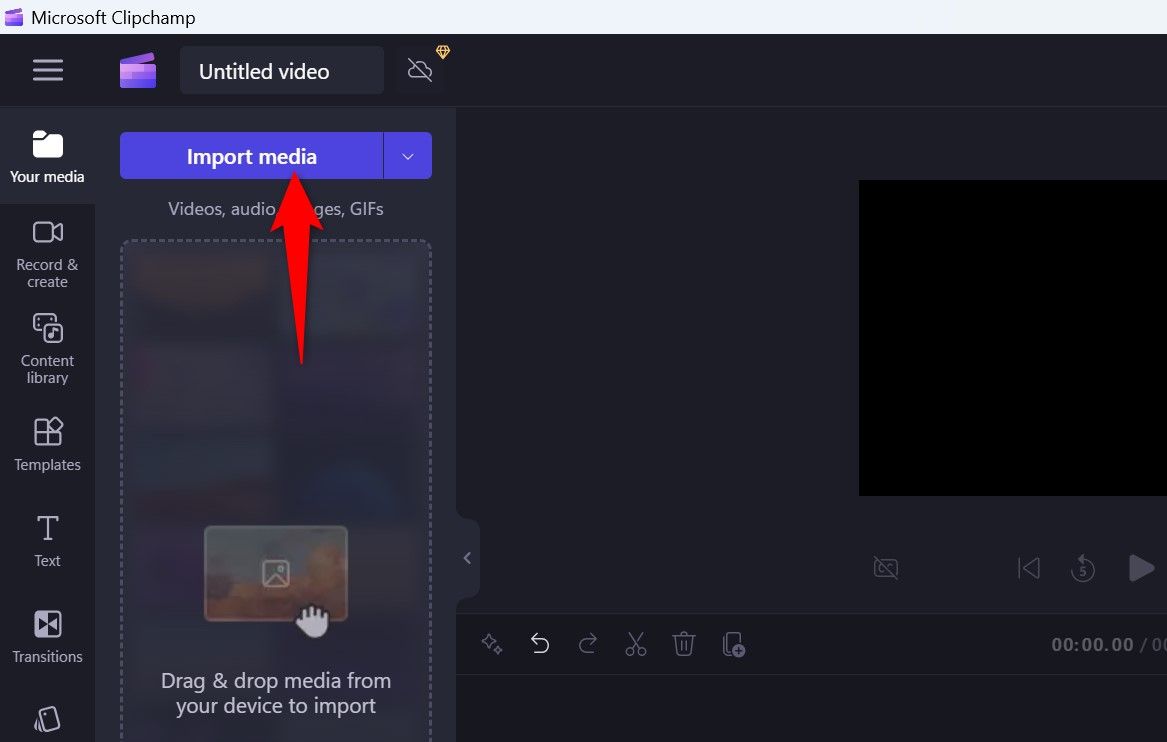
At the top, select “Import Media” to add the video lecture you want to turn into an audiobook. On the open window, find and select your video file.
If your video is hosted on a platform like OneDrive, Google Drive, or Dropbox, click the down-arrow icon next to Import Video and select the appropriate platform.
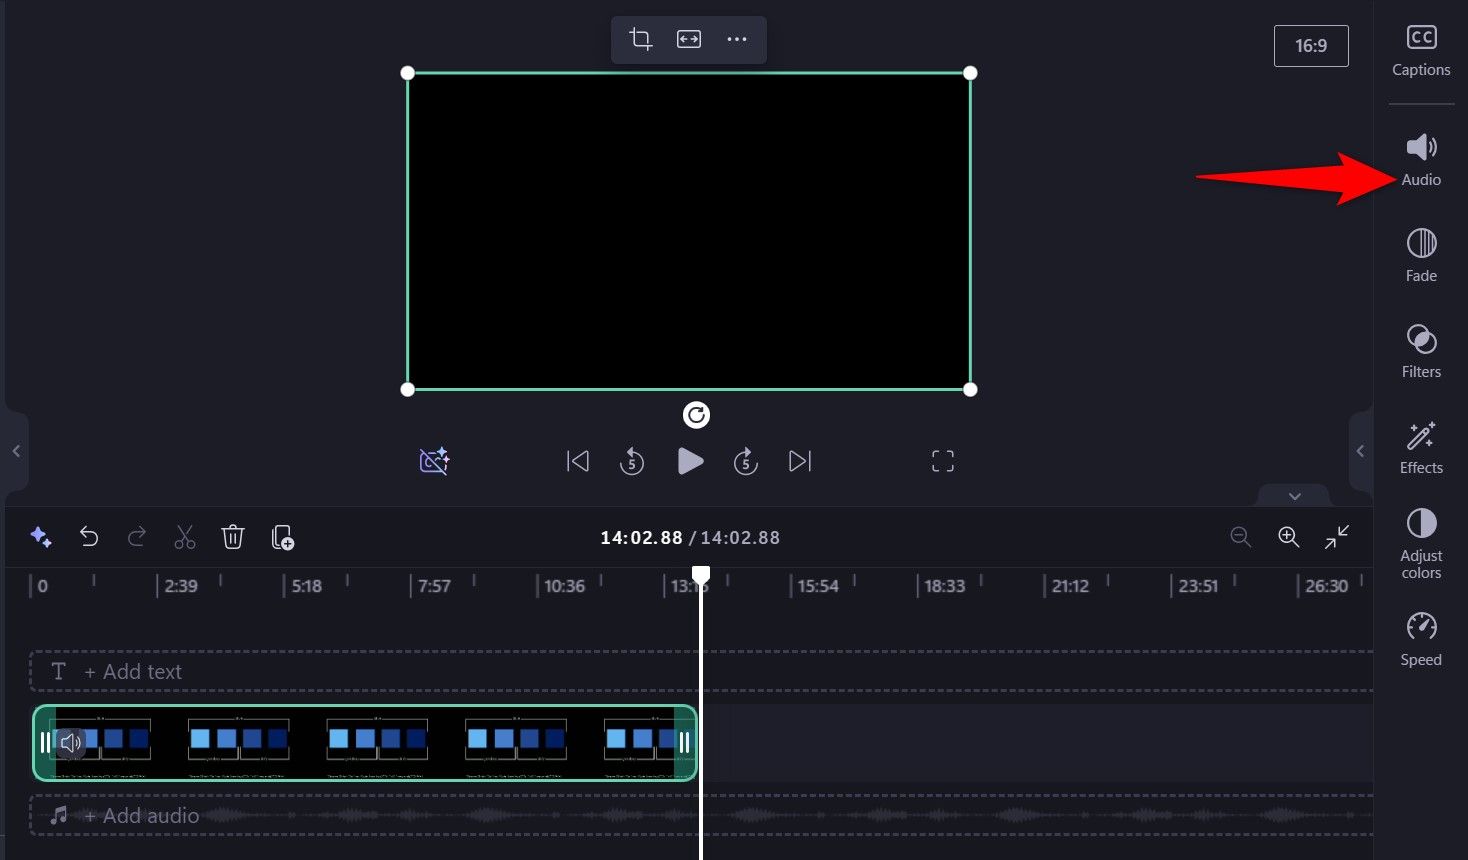
When your video appears in the app, drag it and place it onto the timeline. Then, select the video on the timeline so it’s highlighted, and click “Audio” in the right sidebar.
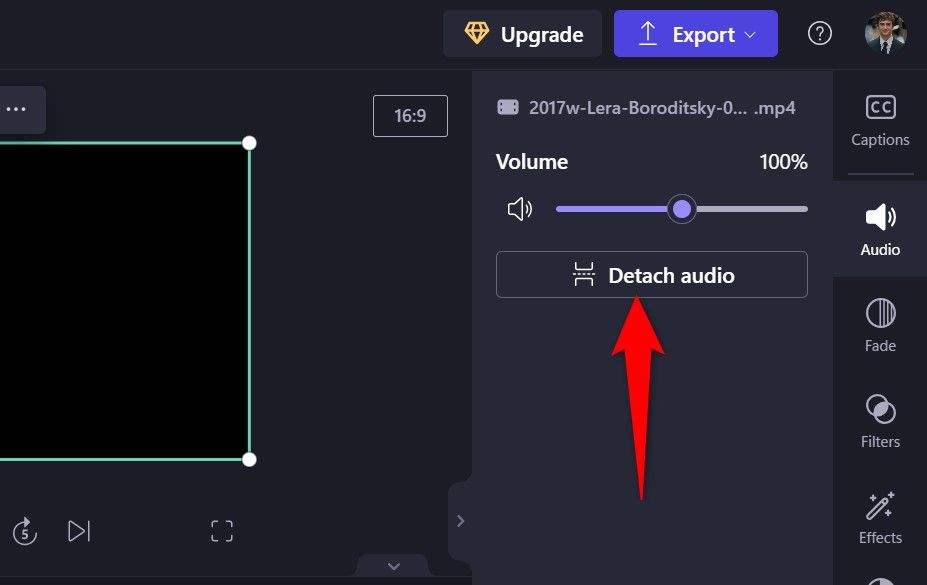
From the available options in the right sidebar, click “Detach Audio.”
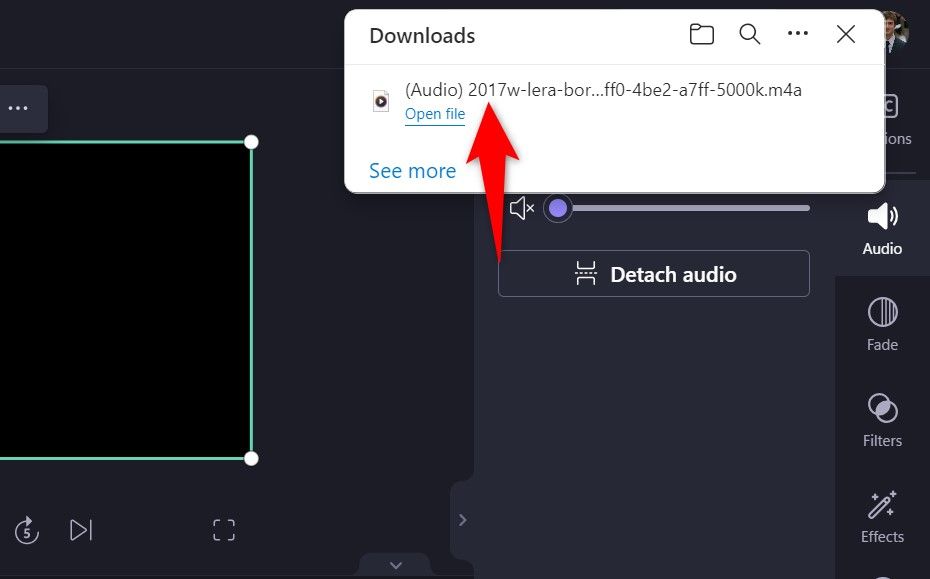
The app will detach the audio from the video and save the resulting audio file in your PC’s Downloads folder. In the screen’s top-right corner, a notification will appear saying an M4A audio file has been saved to your computer.
Find and access your Downloads folder, and you’ll see your newly created audiobook there.
To turn a video into an MP3 audiobook, utilize the free and open-source VLC Media Player app. In addition to letting you play dozens of file formats, the app allows you to convert media files from one format to another.
If you haven’t already, download and install VLC Media Player on your PC. Then, launch the app.
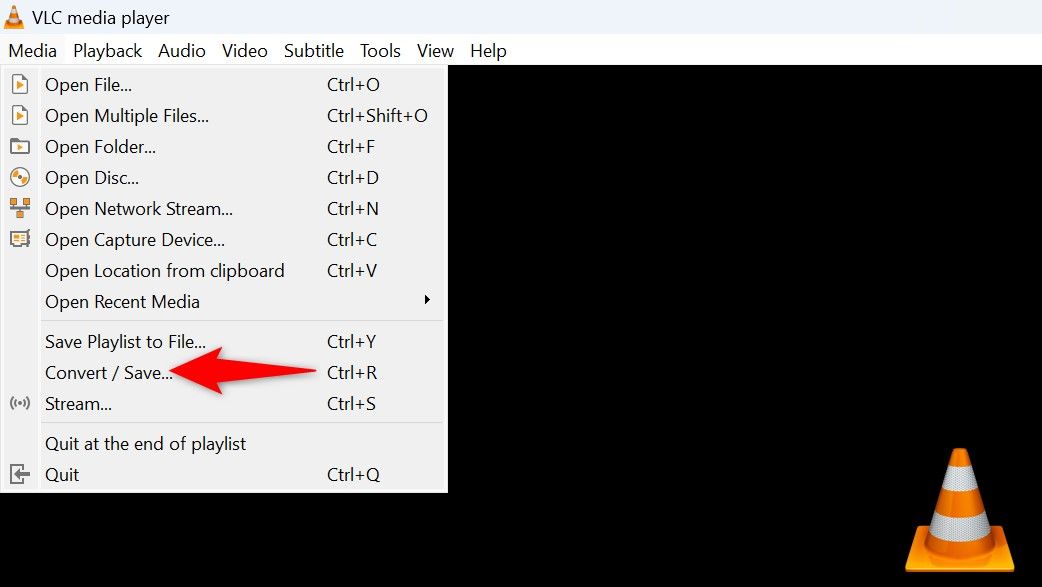
From the app’s menu bar, select Media > Convert/Save. Alternatively, press Ctrl+R on the keyboard.
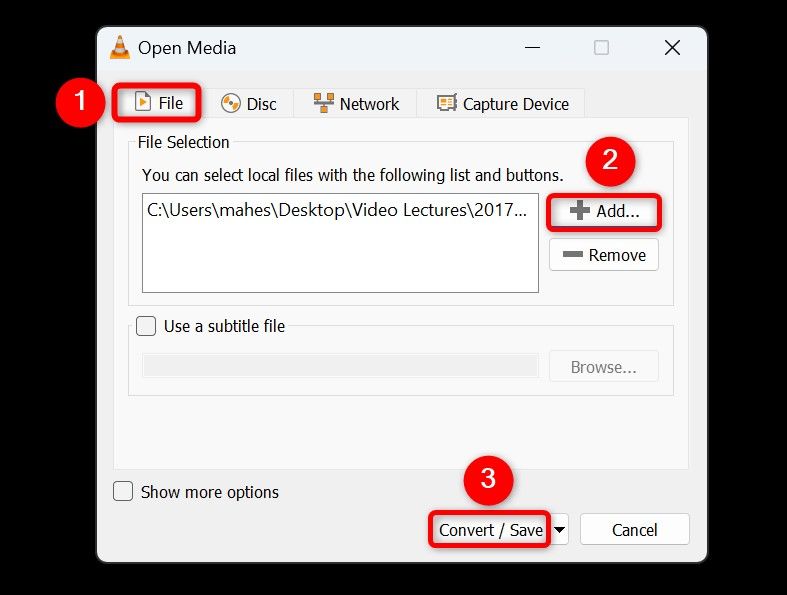
On the Open Media window, select the “Files” tab. Click “Add” and choose the video file you want to convert to audio. Then, at the bottom, click “Convert/Save.”
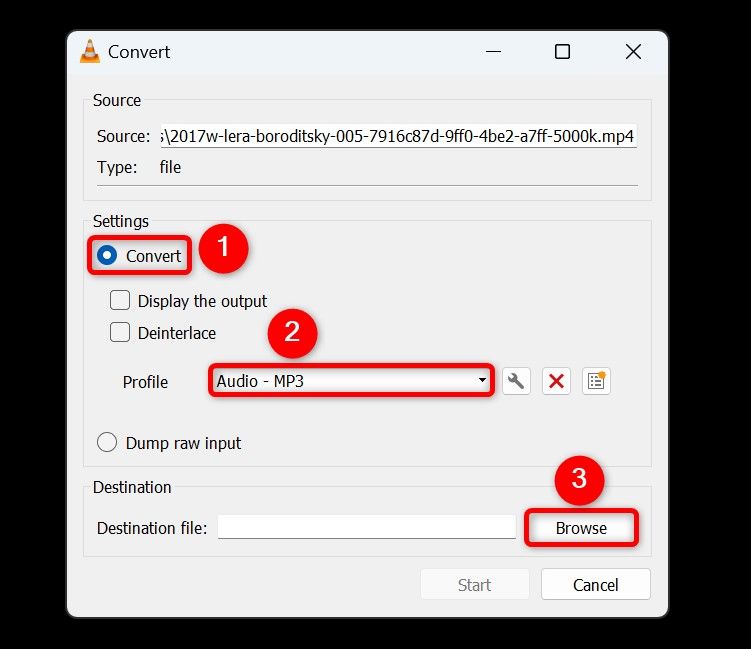
On the following screen, enable “Convert.” Click the “Profile” drop-down menu and choose “Audio – MP3.” Next to Destination File, click “Browse” and choose the folder to save the resulting audio file in.
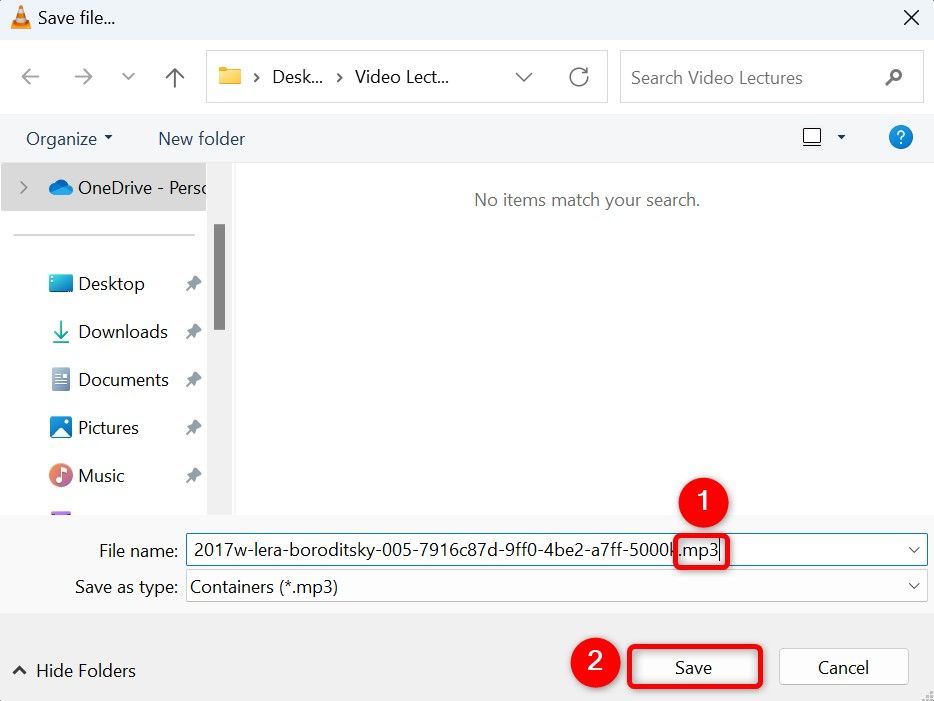
On the Save File window, replace mp4 in the File Name field with mp3. Then, click “Save.”
Back on the Convert window, click “Start” to begin turning the selected video into an audiobook. When VLC has finished the conversion, the resulting audio file will be available in the chosen folder.
From Command Prompt Using FFmpeg (Free and Open-Source CLI Method)
If you prefer command-line methods, you can use FFmpeg to turn videos into audio lectures. This is a command-line tool that allows you to perform many types of actions on your media files, including conversion from one format to another.
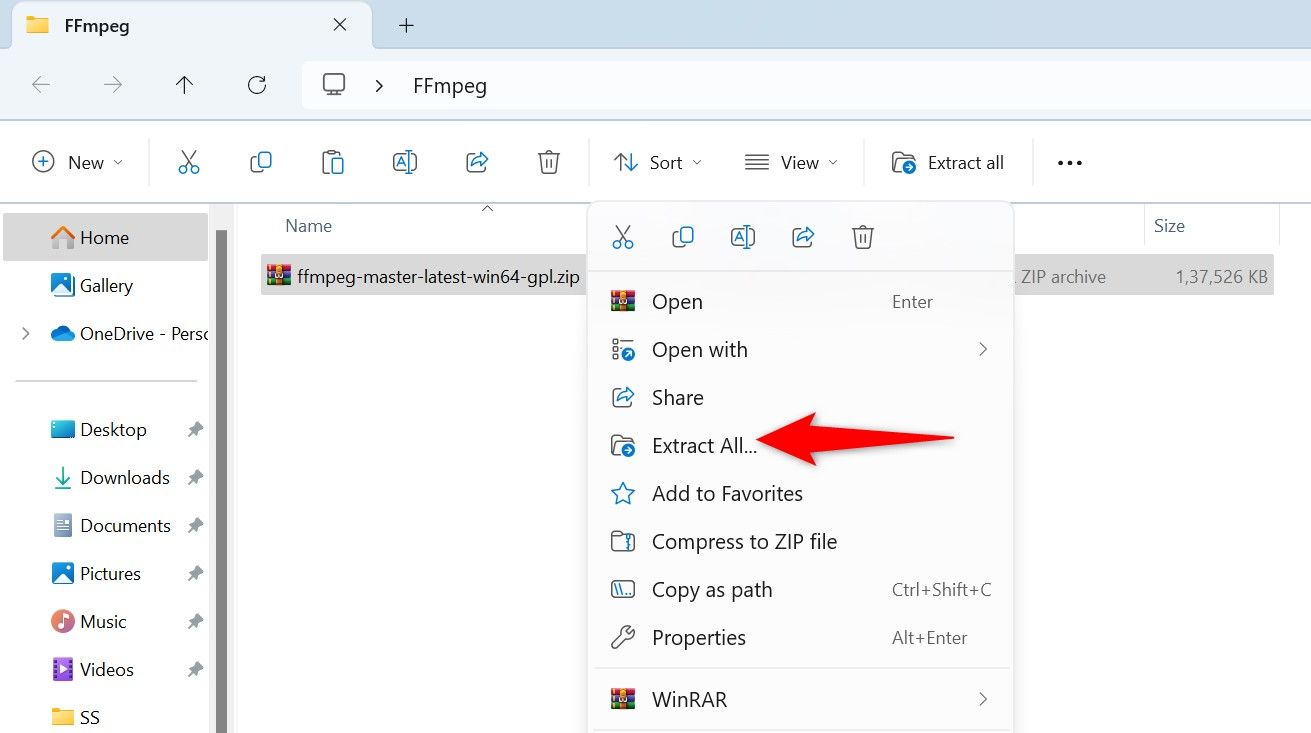
To use the tool, head over to the FFmpeg site and download the package file. Then, right-click the downloaded file, select “Extract All,” and choose “Extract.”
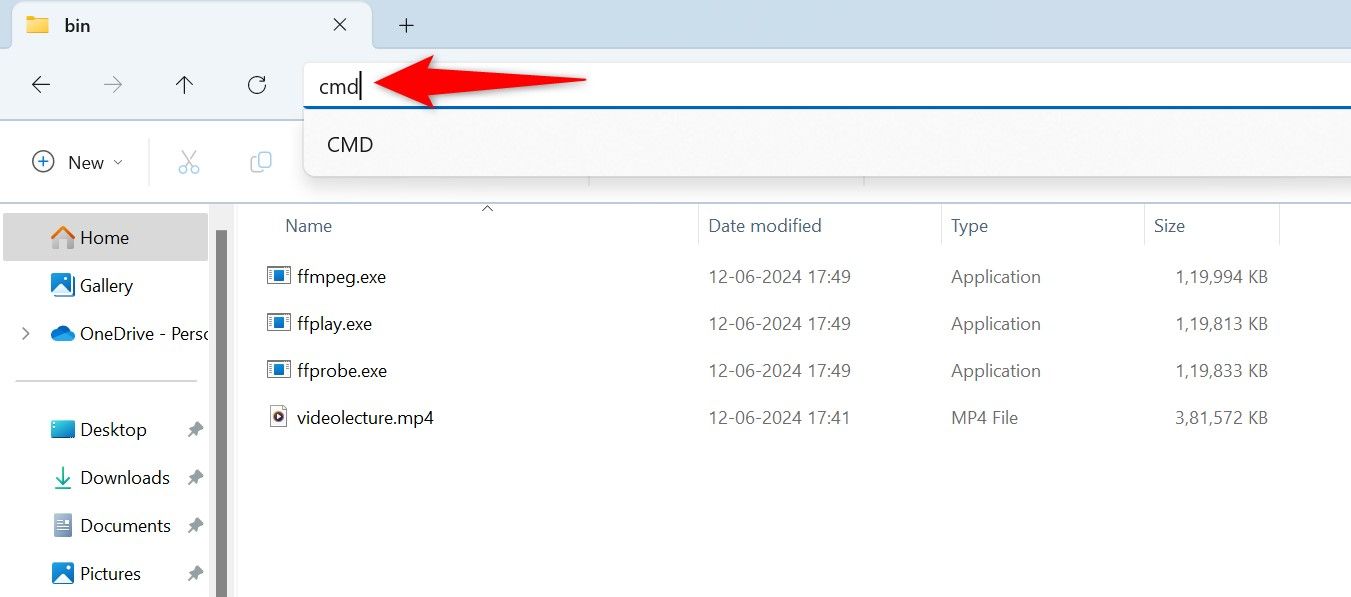
Copy the video file you want to turn into an audio file. Open the folder where you extracted FFmpeg, find and open the “bin” folder, and paste the video file.
Then, click File Explorer’s address bar (where you see the current folder path), type cmd, and press Enter. This will open a Command Prompt window in the current folder.
On the CMD window, type the following command. Replace videolecture.mp4 with the name of the video file and audiolecture.mp3 with the name of the resulting audio file.
Then, press Enter on the keyboard.
ffmpeg -i videolecture.mp4 -vn audiolecture.mp3 Let FFmpeg perform the conversion. When it’s done, you’ll see the audio file in the “bin” folder.
If you don’t wish to install or use a Windows app, you can utilize an online tool to convert videos to audiobooks. Note that this method requires you to upload your entire video file to the conversion site and then download the resulting file to your computer. This can take a long time if your video file is large.
If you’re fine with that, launch a web browser on your PC and head to Online Audio Converter. This is one of the web-based tools allowing you to convert media files.
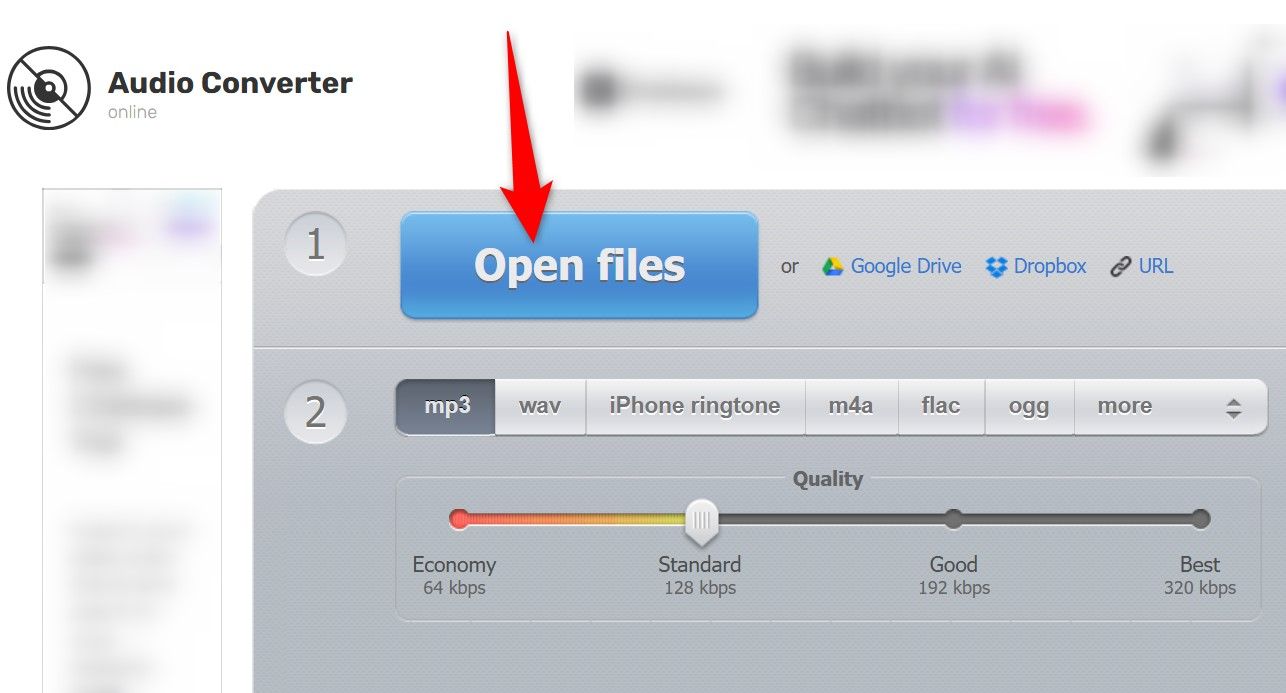
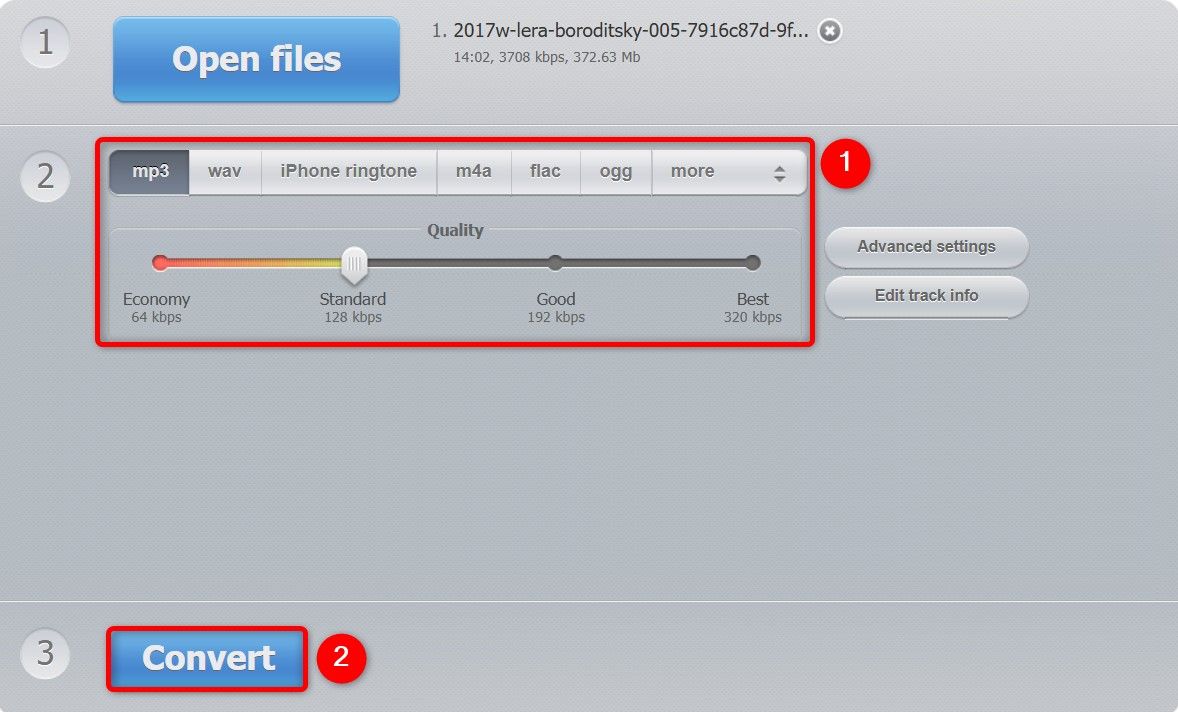
On the site, click “Open Files” and choose the video to turn into an audio file.
If you’ve saved the video on Google Drive, Dropbox, or a site, click the appropriate option next to Open Files.
After selecting the video, choose the resulting audio format. MP3 works on nearly all devices, so choose this format if you aren’t sure. Optionally, choose the quality of the audio file.
Then, at the bottom, click “Convert” to start the conversion process.
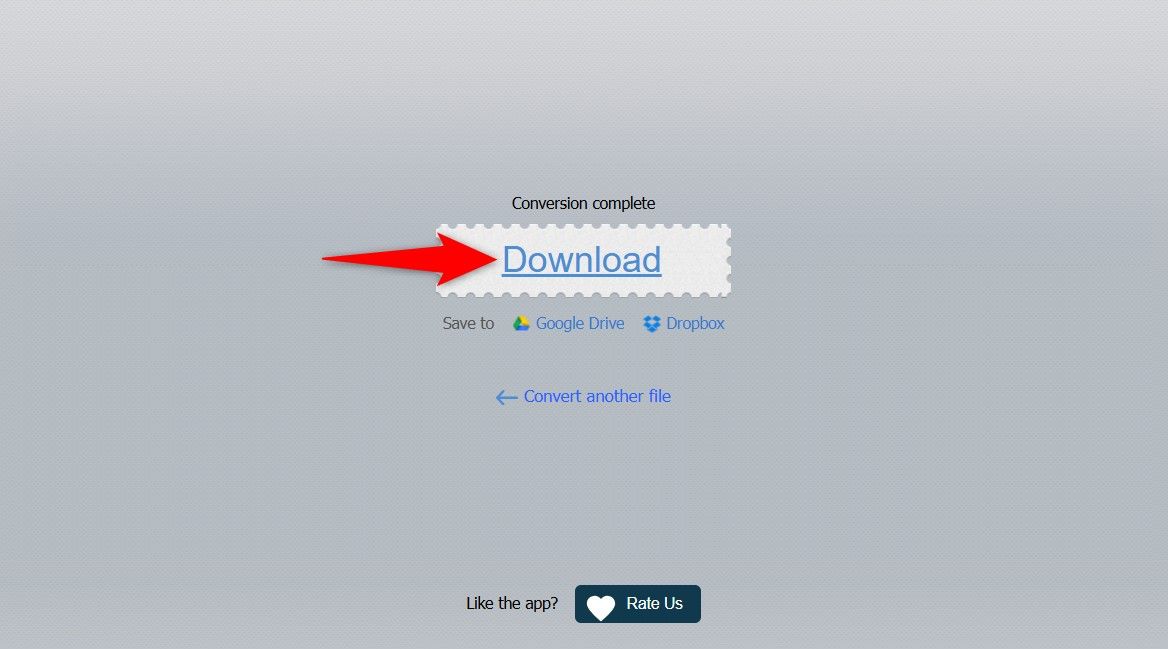
When the tool has converted the file, click “Download” to save the audio file to your computer. You can save the file directly to Google Drive or Dropbox by choosing the appropriate option.
And that’s it. You now have an audiobook of your favorite video lecture, and you can listen to this file using any audio player on your device. Enjoy!

