Key Takeaways
- Check for power supply issues like overheating, strange noises, and Blue Screen of Death errors.
- Ensure your computer isn’t overheating by monitoring CPU and GPU temperatures, and keep it cool to prevent automatic restarts.
- Scan your Windows PC for viruses using Microsoft Defender or a third-party antivirus tool to eliminate viruses that may cause restarts.
Frustrated by your computer constantly restarting on its own? A disruptive reboot loop can make it hard to be productive. Luckily, there are several ways to troubleshoot the issue, and we’re going to show you 11 of them.
1. Check for Power Supply Issues
Your computer could be randomly rebooting due to a failing power supply unit (PSU). To be sure, look for the following signs as well:
- Sometimes, your computer won’t restart after an automatic shutdown, and may even refuse to turn on.
- You’re getting Blue Screen of Death (BSOD) errors.
- The PSU is overheating, giving off a burning smell, or releasing smoke.
- The PSU is making strange noises.
You can call a computer repair professional to look at your PSU. They will either repair it or recommend getting a replacement.
It could also be that the PSU can’t handle your load, meaning some components aren’t getting enough power. This can cause system instability and trigger random restarts. To fix this, reduce the load or replace your PSU with a more powerful one.
2. Make Sure Your Computer Isn’t Overheating
When certain hardware components, such as the CPU and GPU, overheat, your computer can go into self-preservation mode. It will do this to protect other components from heat damage. One of the signs of an overheating PC is automatic restarts.
To know if the problem is related to overheating, touch your computer after it automatically restarts to see if it is hot. If it is, we recommend monitoring the temperature of the CPU and GPU (these are the biggest heat producers) during use. Then, do everything you can to keep your computer from overheating.
3. Scan Your Windows PC for Viruses
Some viruses can also force your computer to restart. On top of that, you may notice other red flags of a virus infection, such as sluggish performance and frequent error messages or crashes. To eliminate them, scan your PC for viruses using Microsoft Defender, which we recommend, or a third-party antivirus of your choice.
4. Update Your Windows PC
Windows has bugs, and these can sometimes affect the performance and stability of your PC, causing these annoying restarts. Thankfully, Windows releases updates that patch these up. All you have to do is update your Windows 11 computer and monitor it to see if the random reboots stop.
5. Run the SFC, DISM, and CHKDSK Commands
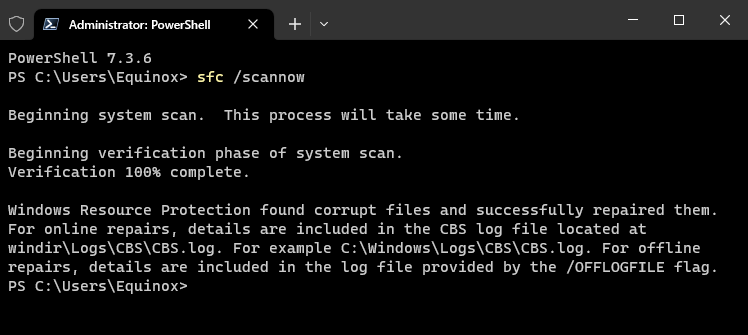
If there’s an issue with system files on your Windows computer, it might constantly restart. To fix that, a quick SFC and DISM scan can help. The former repairs system files when they’re corrupted and the latter will replace any that are missing.
If those scans don’t work, you should follow up with a CHKDSK scan to fix bad sectors or file system issues as well.
6. Remove Any Newly-Installed Software
If the automatic reboots began after installing a particular app, uninstall that app and monitor your PC. If it’s still restarting, it could be that the app made disastrous changes to your settings before you removed it. To undo them, do a system restore.
7. Disable Automatic Restart
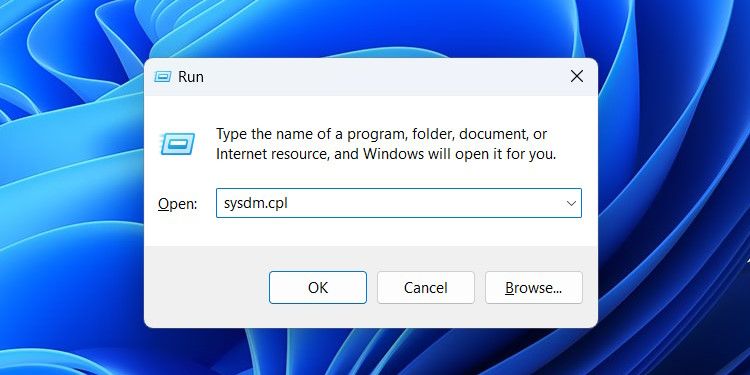
If automatic restart is enabled, your computer will reboot every time it encounters a system failure. To disable this feature, press Win+R, type “sysdm.cpl” in the text box, and then click “OK.”
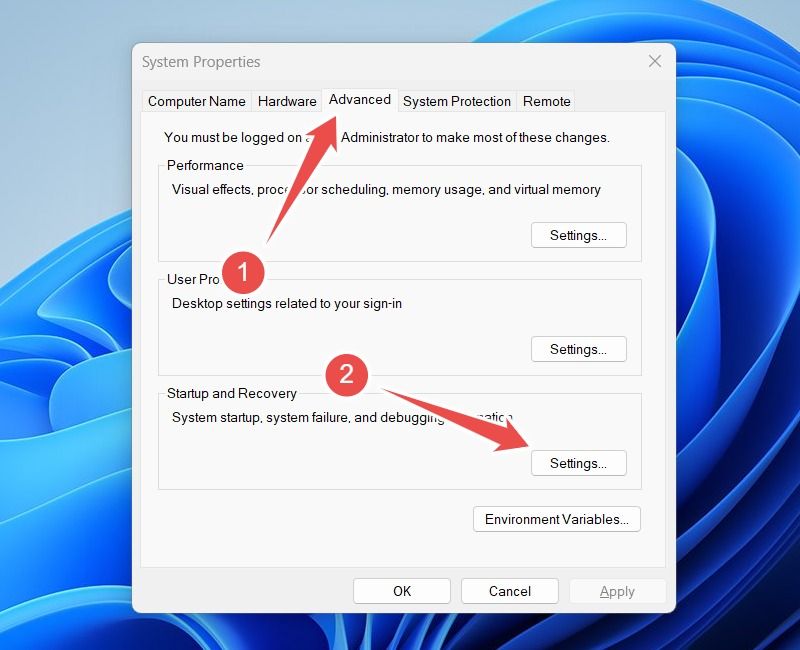
Select the “Advanced” tab and click “Settings” in the Startup and Recovery section.
In the System Failure section, untick “Automatically Restart,” and then click “OK” to apply the changes.
Keep in mind that this will only mask the problem that is triggering the restarts. We recommend continuing with the troubleshooting steps below, even if your computer seems fine.
8. Check for Memory Problems
Whenever your computer can’t save data to Random Access Memory (RAM), it will use secondary memory (your computer’s drive). This process is known as paging on Windows.
A major caveat to paging is that it can affect your computer’s performance. And if your computer relies on it too much, it might become unstable and trigger random reboots. You can use the Memory Diagnostics Tool to scan your computer for memory problems.
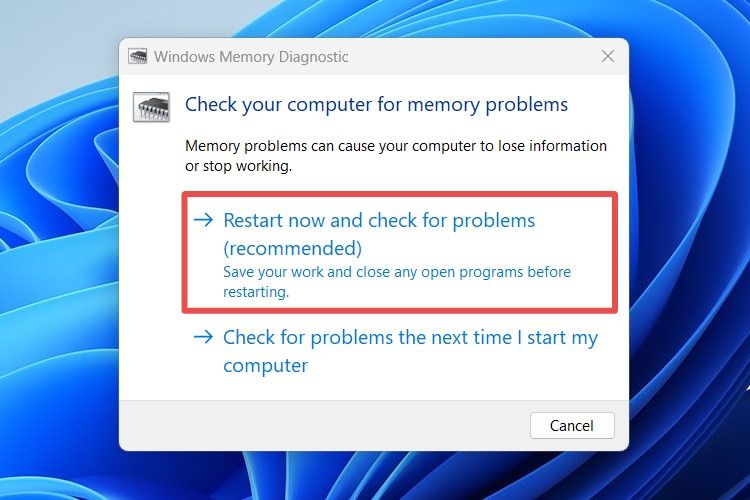
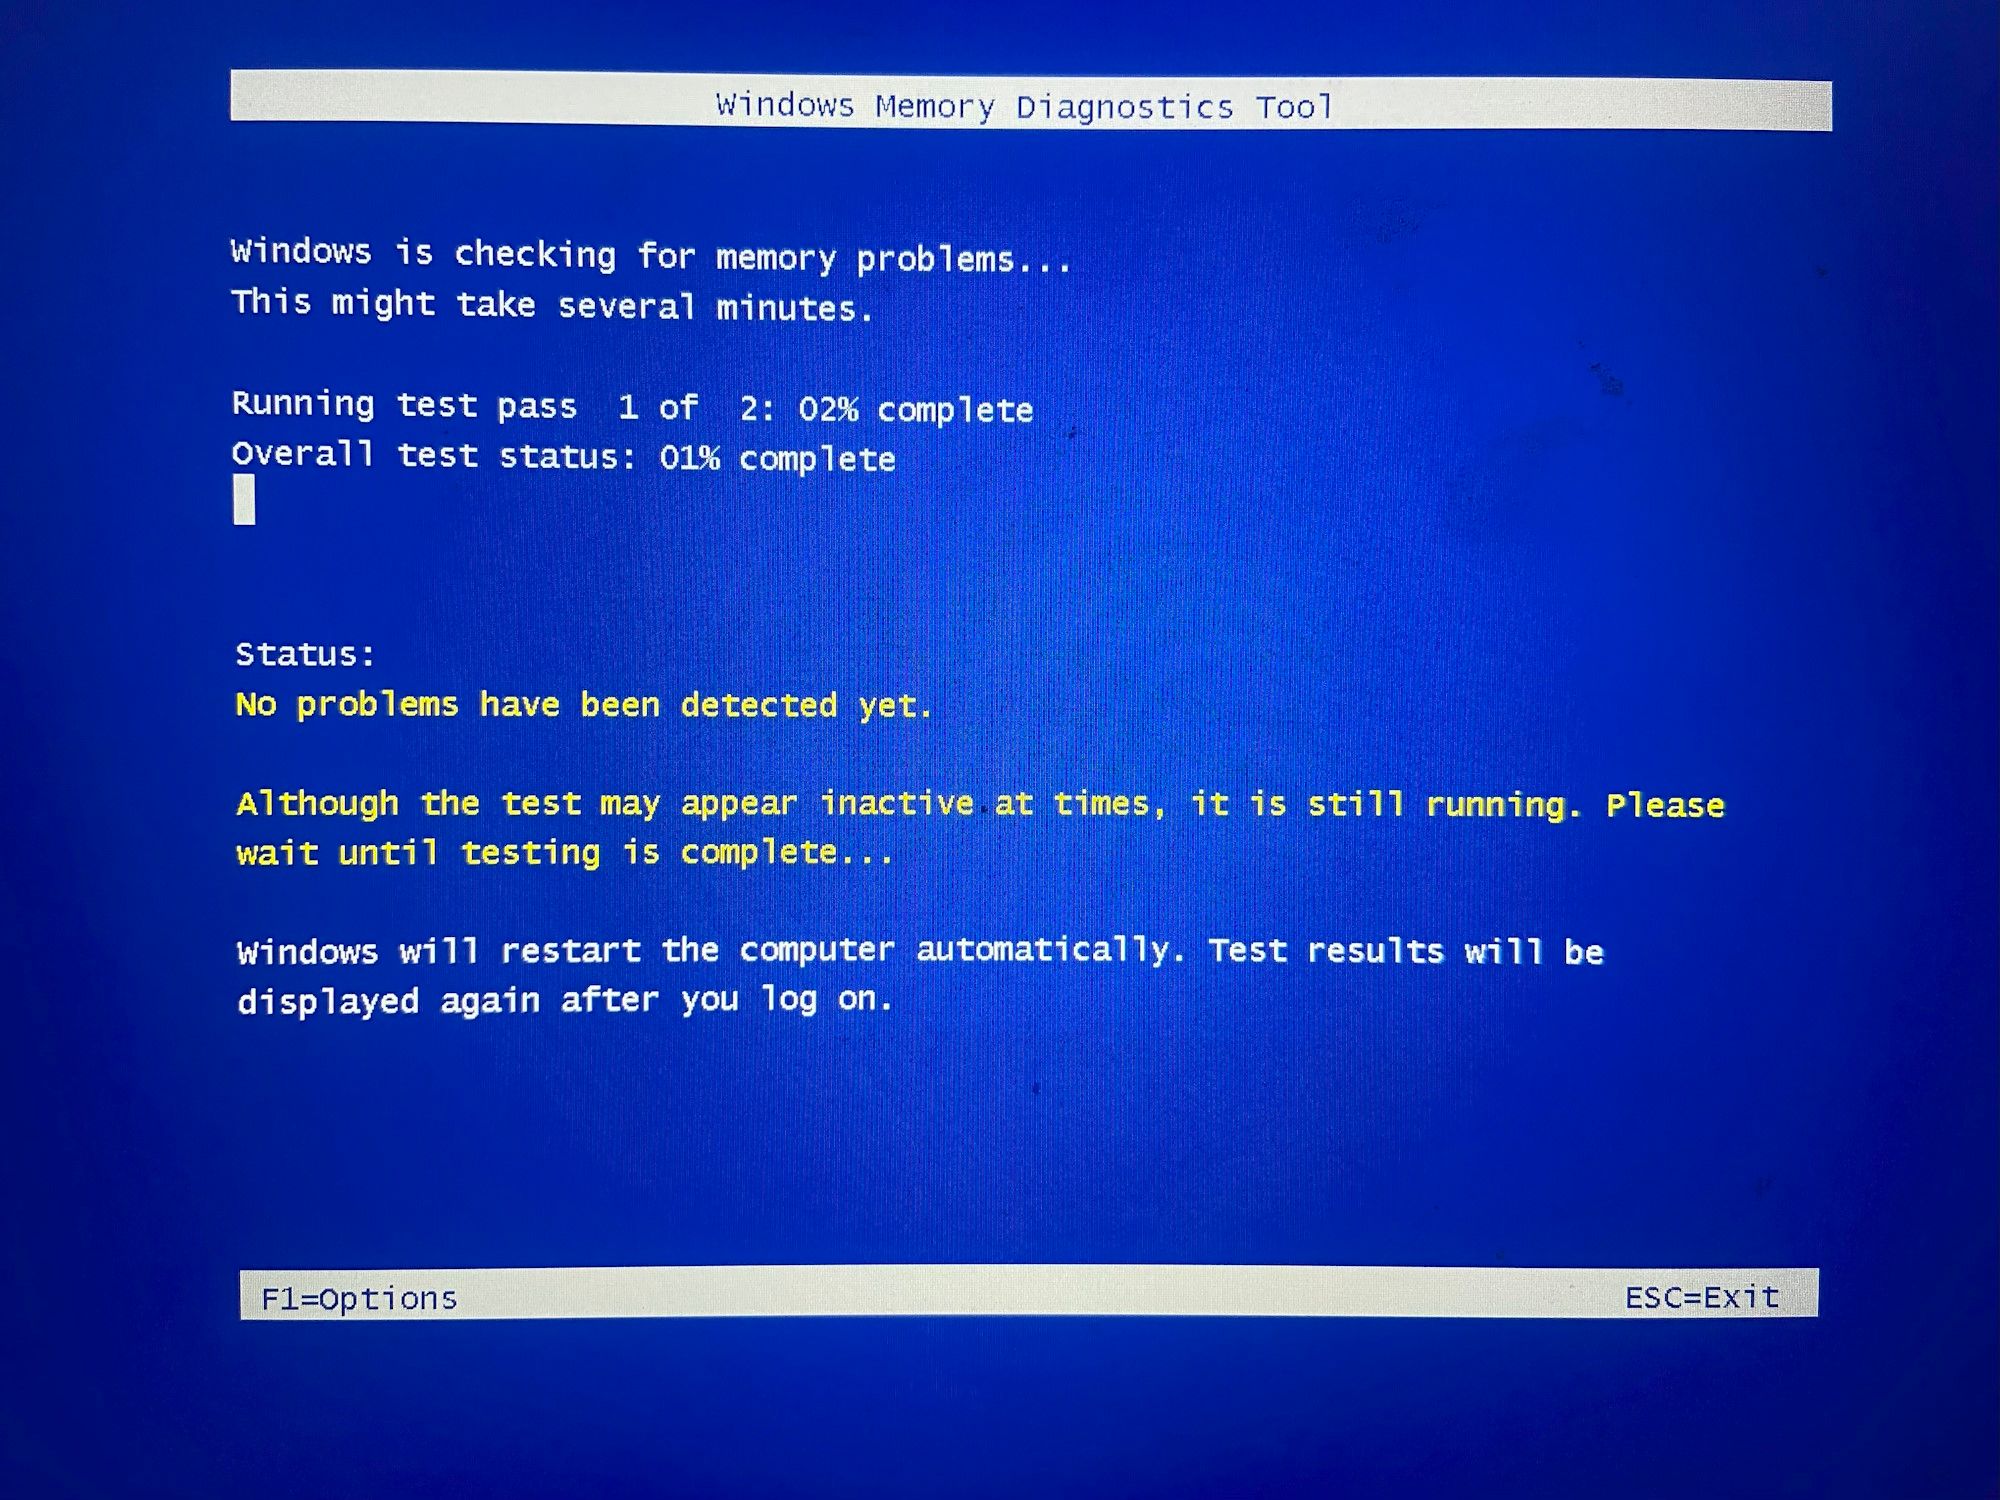
To do that, press Win+R, type “mdsched.exe” in the text box, and click “OK.” Then, select “Restart Now and Check for Problems.”
When your computer restarts, the Windows Memory Diagnostic Tool will perform memory tests. If it detects an error after performing the tests, take note of it. You can then check the manufacturer’s website for information on how to fix the error.
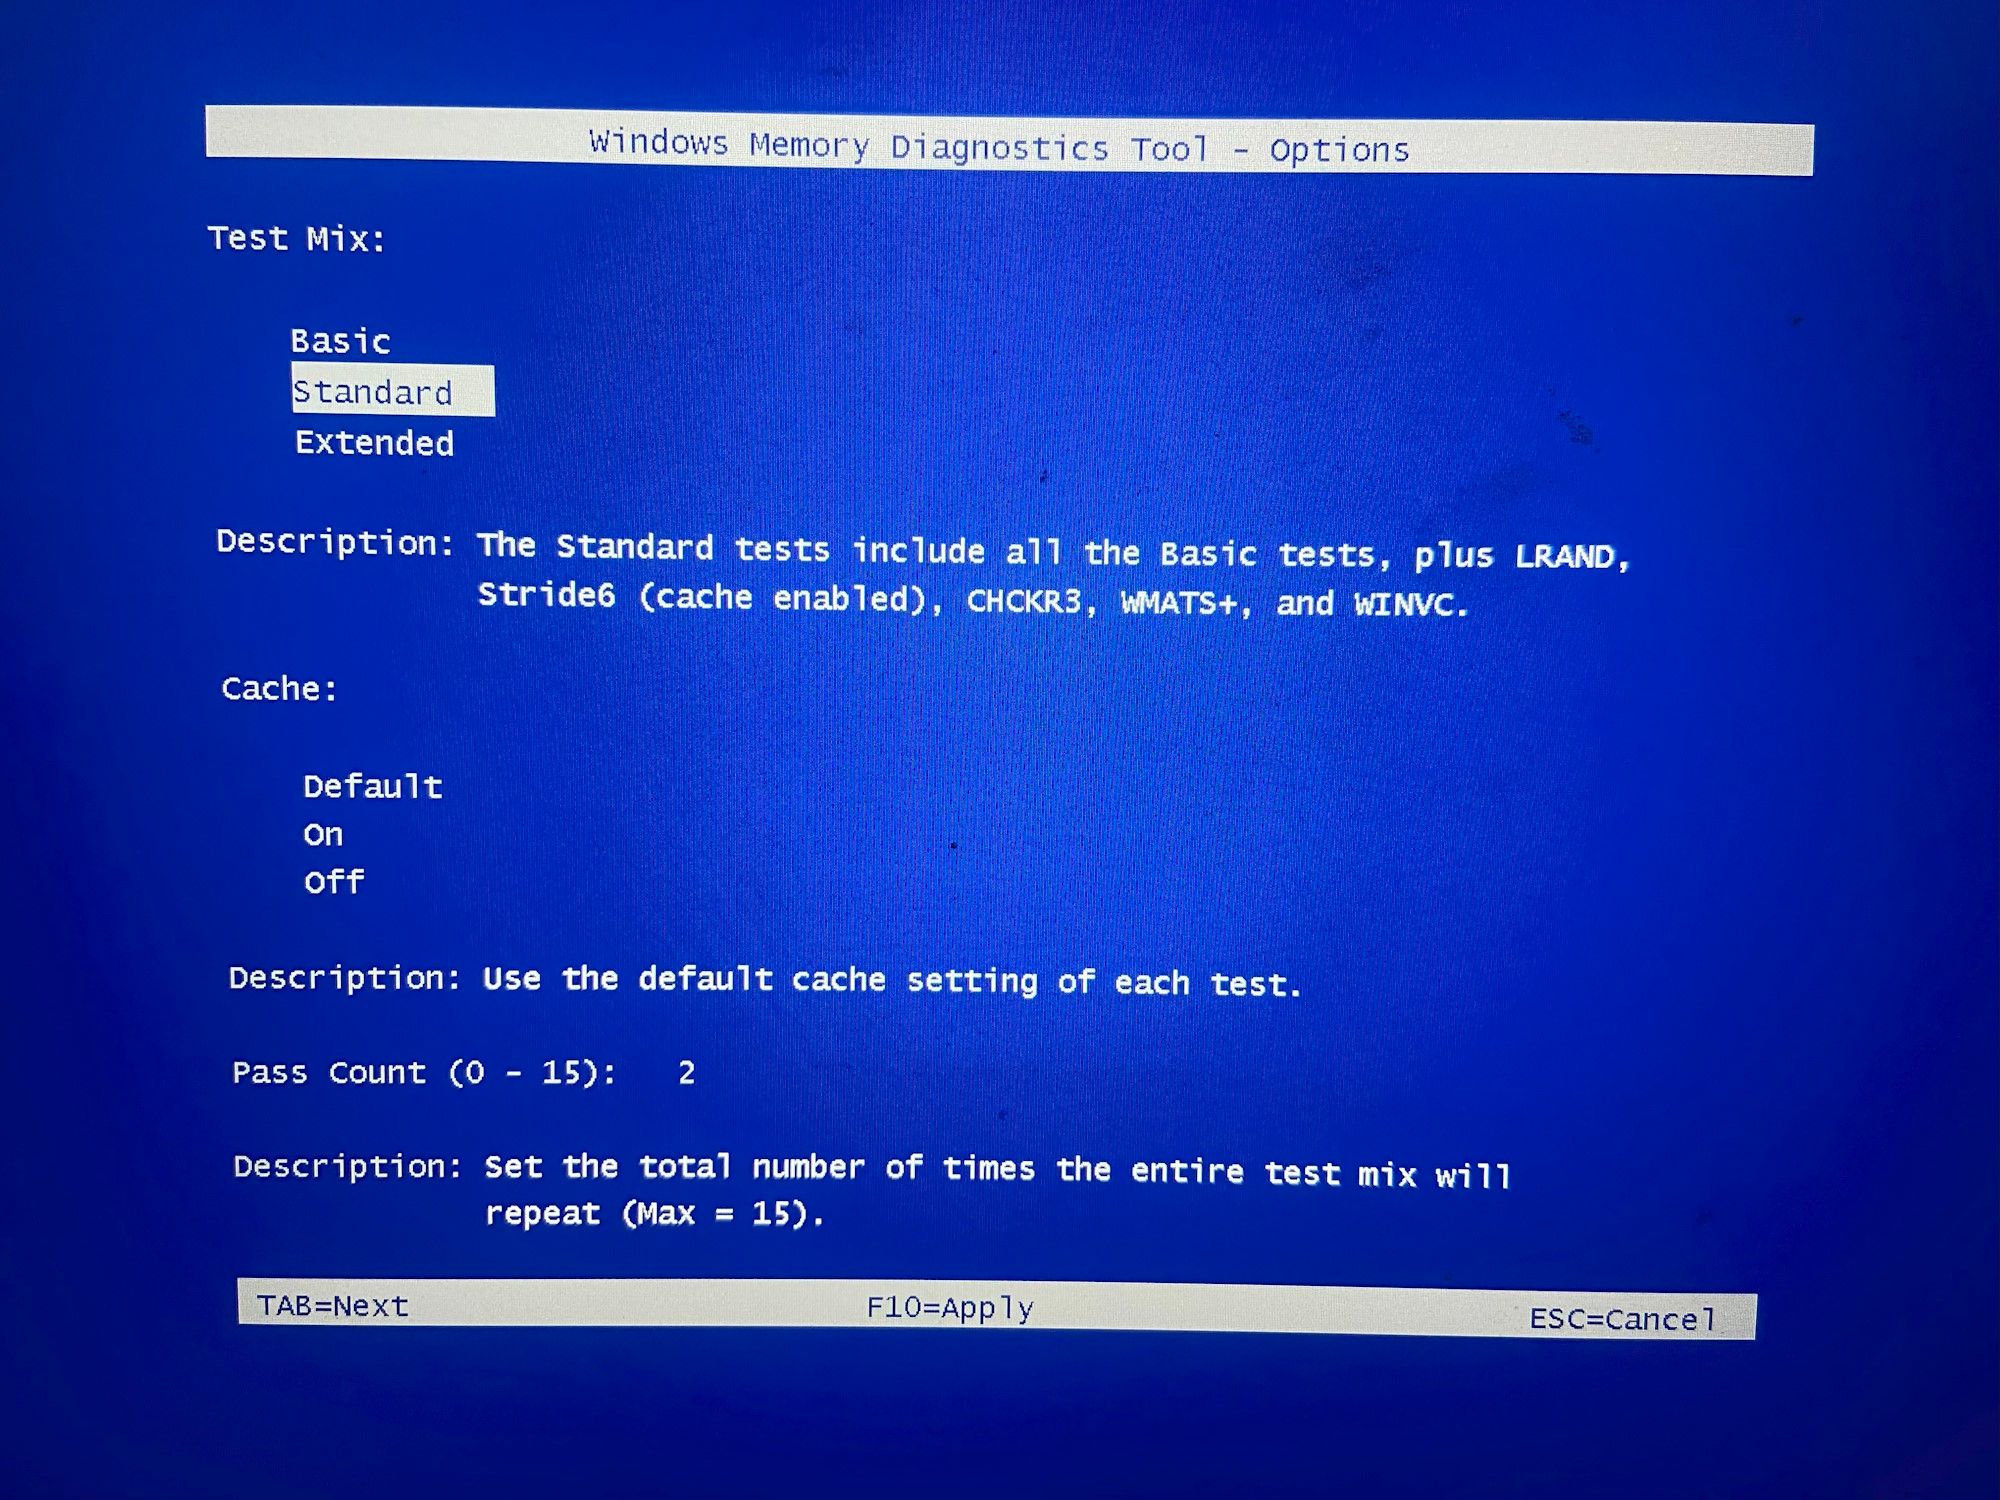
During the test, you can press F1 to choose the type of memory test you want to run. There’s “Basic,” “Standard” (the default), and “Extended.” The Basic test takes the least amount of time since it includes fewer memory checks, while the Extended test takes the most time since more checks are involved.
You can select which test you want using the Up and Down arrow keys and then press F10 to begin (the tool will start over).
9. Uninstall Recent Updates
If the random restarts started happening after an update, uninstalling it may help. There are many reasons why an update can cause problems on your PC. For example, it can happen if the update has a major bug in it or if it didn’t install properly.
Uninstalling updates can cause instability on your PC. This can cause many problems, from apps not working to errors and crashes. If it was a security update, it could also put your PC at risk.
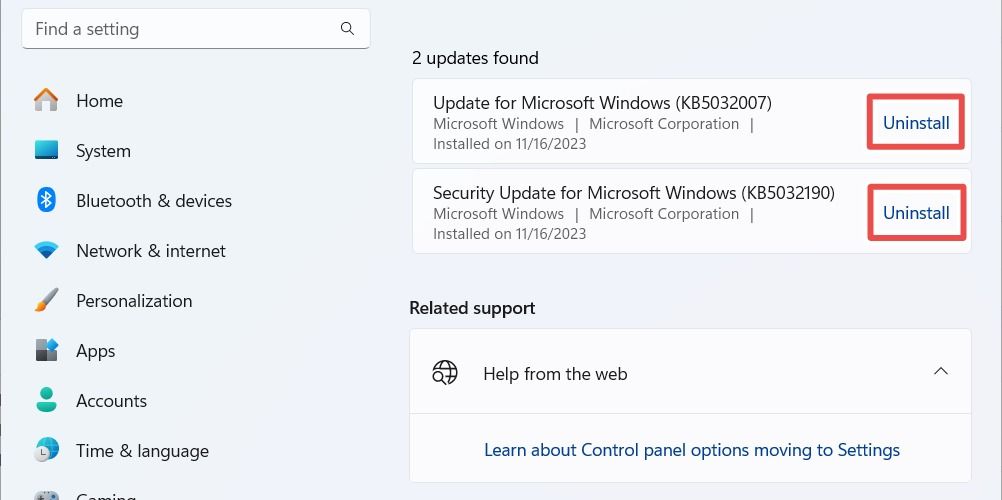
To uninstall a recent update, press Win+i to open the Settings app. Then, head to Windows Update > Update History > Uninstall Updates. You’ll see a list of updates that you can uninstall (Windows will decide which ones). Find the problematic one and click “Uninstall” next to it. If you don’t know which one it is, try removing the one that was installed immediately before the restart problem began—it is most likely the culprit.
Once the update is uninstalled, restart your Windows PC and monitor it for more self-restarts.
10. Reinstall or Reset Your Windows Computer
Another thing you can do to stop your computer from rebooting on its own is to give it a semi-fresh start. We recommend doing an in-place upgrade, which will reinstall Windows without erasing any of your files and apps.
If that doesn’t work, you can reset your Windows 11 computer to give it a completely fresh start. Doing this will return it to its factory default state, meaning you’ll lose everything (apps, data, and settings). Make sure you create a backup of your most important data before resetting it.
11. Check for Hardware Problems
If your computer is still restarting randomly after trying all of the above, there could be a bigger hardware issue here. Grab your laptop or system unit and give it a gentle shake. If you hear any rattling or something moving around in there, it could mean there’s a loose or broken component.
To fix that, you’ll need to repair or replace the part. If you can determine which component is damaged, you can probably replace it yourself. Repairs are more complicated, and you’ll usually need a computer hardware professional to take a look. They can also install a replacement component if it becomes necessary.
Having your Windows 11 computer reboot itself constantly is frustrating because it makes it hard to get work done. It can also signal that there’s a major software or hardware problem with your PC. Just remember that most random restarts are usually not a result of catastrophic hardware failure, and a bit of time spent troubleshooting is usually enough to resolve the problem.

